Today I am sharing the process I use for introducing my students to scales at each level of musical development. I'll also be sharing a few tips, tricks, and free resources that you might find helpful with your students, too!
Keep reading to learn more about how I teach scales!
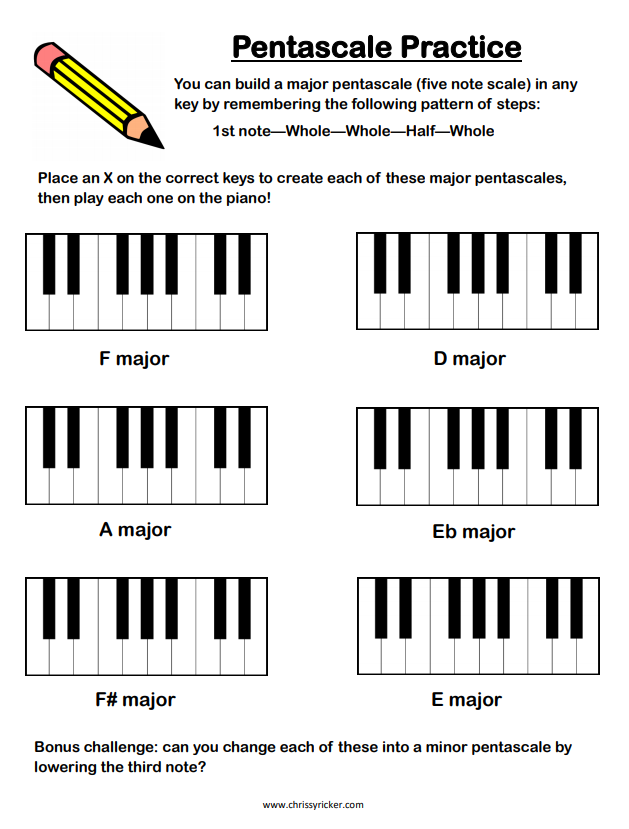
I like to introduce my students to the major and minor pentascales as early on as possible. Not only are these five-finger scales great for developing finger dexterity and as building blocks for improvising and composing, they give students the chance to experience playing in a variety of tonal centers, even those they haven't encountered in their music books yet.
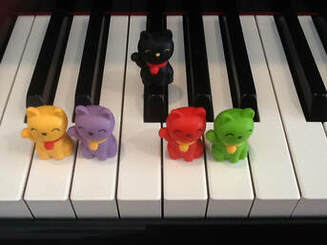
We start by learning the "formula" for building pentascales using whole steps and half steps. This is a fun activity to do using puzzle erasers (like the ones in the photo) on the piano! I also like to use this pentascale practice sheet (click on the image to download your free PDF).
2. The Circle of Fifths
Once students are ready to start learning their one-octave scales, I like to introduce them to the circle of fifths. Learning about "the magic circle" really helps students to understand and memorize the key signatures for each scale. It also helps us to organize the scales into a logical progression for learning.
Here is a video that shows the process I use for introducing the circle of fifths:
Do your students have trouble remembering the correct fingering for each scale? I have found that grouping scales together by finger pattern during the learning process can help students tremendously!
There are 3 main finger patterns that almost all major and minor scales follow:
- 1-2-3-1: This is the first pattern most students learn since it is the pattern used by the C major scale. In this pattern, the thumb always crosses under the third finger as you play the scale.
- The black key rule: In this pattern, fingers 2-3 are placed over the group of 2 black keys and fingers 2-3-4 are placed over the group of 3 black keys whenever they occur in the scale. This is the pattern used, for example, by B major (which uses all 5 black keys) as well as B minor (which doesn't use all of the black keys but follows the same finger pattern).
- 3-2-1-4: The Bb, Eb, and Ab major scales all use this finger pattern in the left hand (as does the G# harmonic minor scale). Each of these scales starts with finger 3 in the left hand and finger 4 crosses over the thumb.
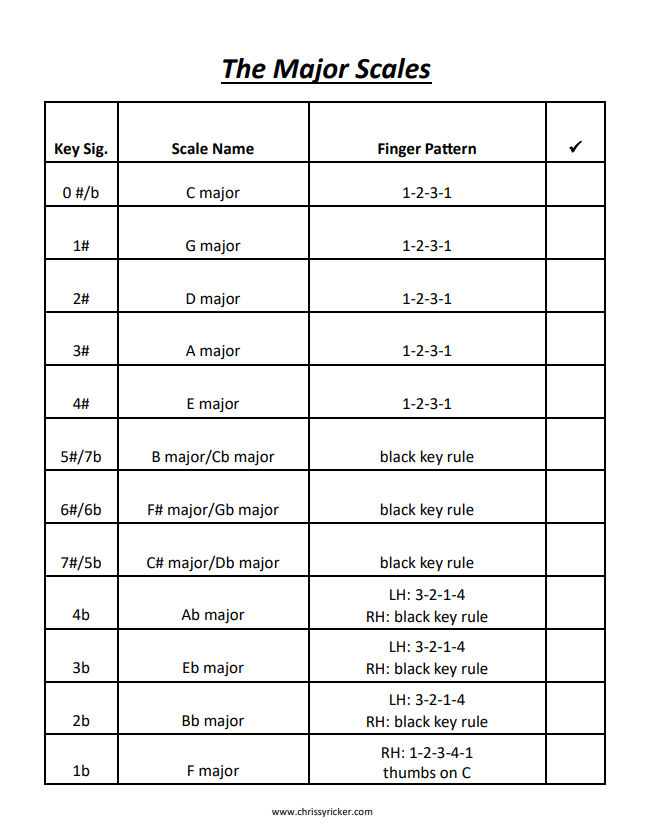
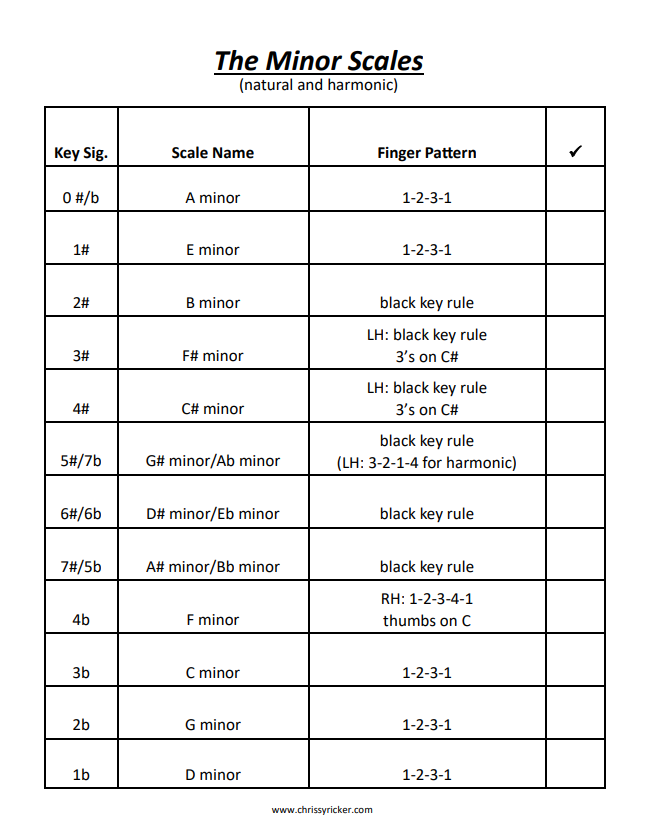
The scale charts below can help students see which scales follow the same finger pattern. You can see that with the exception of F major and F minor, every scale uses one of the 3 finger patterns described above in some form. (Note: I've also included a note for the scales where I find it helpful to remember that certain fingers always play at the same time in both hands. For F major and F minor, both thumbs always play together on C; for F# minor and C# minor, both 3 fingers should land on C# at the same time.)
We learn the scales in groups, spending a few weeks focusing on a group of scales that use the same finger pattern. This gives students a chance to understand not only the finger pattern of each scale, but also to memorize the key signature and its relationship to the other scales on the circle of fifths.
Click on the images below to get a free PDF copy of these scale charts!
Once students have learned the major and minor one-octave scales and can play them all confidently and comfortably, we start to add a second octave. A few tips I have found helpful for playing scales in multiple octaves:
- Start with the black key scales first, since these scales always use the same finger pattern, no matter how many octaves you play.
- Practice one octave up and down in quarter notes, then two octaves up and down in eighth notes. This gives students a chance to review the finger pattern and key signature before they play the two-octave scale. This also encourages students to build speed as they practice their scales. (Three-octave scales may be played in triplets and four- octave scales in sixteenth notes, using the same method.)
- Practice the 1-2-3-1 white key scales (C, G, D, A, E major/minor) hands separately until the new finger pattern is mastered. In these scales, the thumb will cross under finger 3, then under finger 4 to start the second octave. We do lots of repetitions of "3-4-3" to help students remember this new pattern. It is also helpful to have students practice stopping on finger 3, since both hands should always land on finger 3 at the same time when playing these scales.
5. Reviewing Scales
Of course, the only way to help students make sure they truly know the key signature and finger pattern for each and every scale is to play them regularly.
One of my favorite ways to review scales is to use dice! Roll a single die and have students play the scale with that number of sharps or flats. (For example, if a student rolls a 2, they might play D major, B minor, Bb major, or G minor.) This is a great way to keep scale and key signature review fresh and make it just a bit more fun.
What do you think? What are your best tips for introducing scales? How do you help your students keep them fun and fresh? I'd love to hear your ideas in the comments!


 RSS Feed