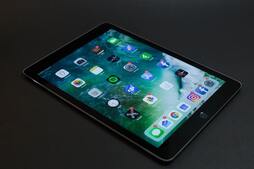
The teaching tool I will be sharing today was an investment...but I feel it has been worth every penny--and, don't forget: teaching tools are tax deductible!
Today's teaching tool is...the iPad!
I purchased a refurbished iPad several years ago and it has changed the way I teach. As a part-time travel teacher, my iPad provides me with maximum portability for my music and games, so I no longer need to carry notebooks full of materials to my travel lessons. Incorporating technology into my lessons has also engaged my students in a different way and made our lessons more fun.
(A note: many of these activities can also be done with a phone or tablet. However, I will be focusing on the iPad, since that is what I currently use with my students and what I have found that most of my students have access to at home. If you use an alternate device for any of these activities, please feel free to chime in and let us know what you use in the comments!)
Here are a few of the ways I use my iPad in piano lessons:
1. Apps, apps, and more apps!
For the most part, apps have replaced written theory books for my students. (Shocking, I know!) While I still supplement with composition activities and the occasional theory worksheet, I find that there is an iPad app for just about everything I want to cover theory-wise with my students. Note naming, rhythm drills, identifying key signatures and intervals, sight-reading, ear training...you can find apps for all of these, and more!
I find using apps makes it easy to choose an appropriate activity for a student on the fly during our lessons. Is a student having trouble counting dotted quarter note rhythms? I pull up "Rhythm Lab" and we do some drills. Are we learning intervals and need practice telling the difference between a fifth and a sixth? "Tenuto" has a great interval recognition exercise. Does a student need a refresher on the note names in the bass clef? "Note Rush" is a favorite app for this with my students.
Since many of my students (or their parents) have iPads at home, it also works well to have my students purchase their own apps to use at home. And, I have found that most of my students are more likely to want to practice with an app than to do a written theory assignment.
2. Watching YouTube videos.
The iPad is the perfect size for watching videos since it has a larger screen and fits nicely on the music rack of the piano. YouTube offers a wealth of material for activities such as:
- Comparing performances of repertoire pieces. This is a great opportunity to teach your students about musical interpretation and to point out the range of quality you will find in recordings on YouTube.
- Listening to songs for ear training. YouTube is a great place to look for recordings of your students' favorite pop songs for ear training purposes. You can do everything from analyzing the form and identifying the time signature of a song, to identifying the key and playing the melody by ear. Look for videos marked "official" or those offered on a "Vevo" channel to be sure you are getting a version of a song in the original key.
- Playing along with recordings of duet pieces. Pro tip: you can slow down the speed of a video in the YouTube app by clicking on the three dots in the corner of the screen and selecting "playback speed." This is great for play-along practice!
- Watching video tutorials for rote pieces. From computer-generated videos using software like Synthesia and Jellynote, to tutorials created by live people using overhead cameras--there is a wealth of tutorial materials on YouTube. If you choose material carefully and use it in moderation, these materials can definitely enhance piano lessons and get your students excited about learning piano in a different way. So don't be afraid to explore these options with your students!
3. Playing backing tracks.
Backing tracks are so much fun and can add a new dimension to your lessons! I wrote a three-part series on backing tracks and how I use them with my students: Part One, Part Two, Part Three.
In a nutshell, the iPad makes it super-easy to access and play backing tracks in your lessons. I store my backing tracks in Google Drive, then access them via my iPad and play them by connecting to a wireless Bluetooth speaker in my studio. I also use the app Audiostretch to slow down backing tracks as needed.
4. Storing digital sheet music.
Thanks to the iPad (and similar tablets) it is possible to digitize your sheet music collection and take it with you! This is so convenient for travel teachers, or for those of us who accompany or play gigs. Carrying one iPad or tablet is much easier (and lighter!) than lugging 10 or 15 large books around!
Full disclosure: I recently upgraded from my 9.5 inch iPad to a 12.3 inch Microsoft Surface Pro just for the purpose of storing and playing my digital sheet music for my own use. The larger screen size, coupled with the fact that the Surface Pro doubles as a laptop and is compatible with the Microsoft products I use on my PC, convinced me to take the plunge. So, while I still use my iPad in lessons with my students, I now use my Surface Pro, the MobileSheets app, and a PageFlip bluetooth pedal for my own personal use when I accompany or play gigs.
What do you think? Do you use an iPad, tablet, or other device in your lessons? I'd love to hear your ideas in the comments!

 RSS Feed