
Teaching technique can be overwhelming. There are hundreds of different technique books out there, and nearly as many different schools of thought on teaching technical concepts. As teachers, we may be afraid of instilling bad habits in our students. Our students, overwhelmed with learning keyboard geography, note reading, and rhythm, may be resistant to practicing technical exercises and taking corrections on their technique. What is a teacher to do?
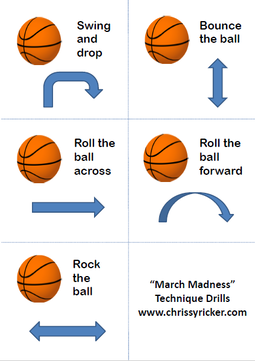
Over the last few years, I have developed an approach to teaching technique to my beginning students that has changed my teaching for the better. Today, I would like to share the first five techniques I focus on with my students, and the activities I use in my lessons to reinforce these skills. We learn these techniques away from the piano first, then we practice them at the piano using rote patterns like scales and broken chords. Finally, we incorporate these techniques into our repertoire pieces. Mastering these techniques in the first year of lessons will create a firm foundation for the more advanced technical concepts that follow.
Over the last few years, I have developed an approach to teaching technique to my beginning students that has changed my teaching for the better. Today, I would like to share the first five techniques I focus on with my students, and the activities I use in my lessons to reinforce these skills. We learn these techniques away from the piano first, then we practice them at the piano using rote patterns like scales and broken chords. Finally, we incorporate these techniques into our repertoire pieces. Mastering these techniques in the first year of lessons will create a firm foundation for the more advanced technical concepts that follow.


 RSS Feed